In the Jenkins pipeline there were two types one was declarative, and another one was a scripted pipeline. Both the pipeline are DSL(Domai...
In the Jenkins pipeline there were two types one was declarative, and another one was a scripted pipeline.
Both the pipeline are DSL(Domain Specific Language).
What is Domain-specific Language:
DSLs are small languages, focused on a particular aspect of a software system. You can't build a whole program with a DSL, but you often use multiple DSLs in a system mainly written in a general-purpose language.
In Jenkins, we can able to create a pipeline using the following three methods.
1. Using Blue Ocean UI
2. Using Classic UI
3. Using SCM
Blue Ocean:
After setting the pipeline using Blue Ocean UI, we can create the Jenkins file and commit it to the source code.
Classic UI:
We can create the basic pipeline using classic UI.
Using SCM:
We can create the Jenkins file manually and commit it to the source code.
The syntax of each pipeline is the same for all.
Now we are going to define the Jenkins declarative pipeline using classic UI
Step 1: log in to the Jenkins server using the username password which was previously created.
Step 2: In the latest version of the Jenkins pipeline plugins were installed automatically when we installed the required plugins at that time. Older versions of Jenkins need to install the pipeline manually.
Step3: Creating the Jenkins job, click a new item in Jenkins Dashboard
Step4: Now create the pipeline job, so we need to add the name of the project and need to select the pipeline option
once the pipeline was created, it was listed on the Dashboard page
Step6: Inside the configure, we have some options, now directly go to the advanced project options.
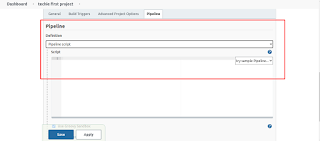
Step7. In the advance project options, we have a pipeline, In the pipeline as two options
1. pipeline script
2. pipeline script from SCM
Pipeline script from SCM, we can use our script file (Jenkinsfile) from git.
Now we are going to use a pipeline script.
Now we are going to write our First pipeline script.
pipeline { -----------------------> 1
agent any -----------------------> 2
stages { -----------------------> 3
stage ("test project"){
steps { ------------------------>4
echo "techie first project"
}
}
}
}
1’ st step need to declare the pipeline
2. Agent -- agent is instructed by Jenkins to allocate the executor, whether agent/node.
Here we are using agent any, which means it can use an agent to execute the pipeline
3. Stage: it contains the steps to build, test, deploy the process,
It is used to visualize the Jenkins pipeline process.
4. Step: It is a single task, it executes the specific process in a defined time.
Once created the pipeline is, apply and save the option.
The log output shows Techie's first project, which we gave in the pipeline.
so finally, we have successfully created and executed the job using the Jenkins pipeline.
In the next blog, we will see to create the pipeline using the SCM method.
---------------------------------------!!!! Happy Learning with Techiev !!!!!!!!---------------------------------
------------------------Subscribe our Youtube Channel by clicking the below link---------------------
----------------------------!!https://www.youtube.com/@techieview729!!---------------------


