Containerizing the Magic: Dockerizing and Running Your React Application (Part 1)

D ocker is used to containerizing the Application and use anywhere, simply pull the container from docker hub. In this post, we are going to...


Docker is used to containerizing the Application and use anywhere, simply pull the container from docker hub. In this post, we are going to Dockerized and run the react application. 

1.Install the docker:                                                                                                                                                                                               The previous blog we have installed the docker on Linux machine.                                                                                          2.Create the application using react.js:                                                                                                                                                            Install the react and create the react application for testing.                                                                                                                    Command : npx create-react-app my-react-docker-app                                                                                                                Once the React Application configured with the default configuration need to go inside the directory.                                             Command: cd my-react-docker-app                                                                                                                                                  React application need to check the working status, so start the npm using the below command:                                                 Command: npm start                                                                                                                                                        The react application was started, So Need to verify using browser http://localhost:3000, Where 3000 was the default port used in the react application.    

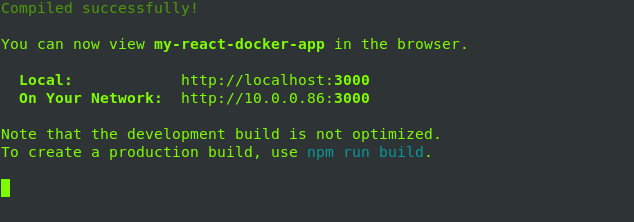
3. Dockerizing the Image:  

Before creating the docker image need to create the Docker file, Inside the docker file need to mention the commands to build the docker image. 

  Create the Docker file is to build Docker Image.    
  Open the react application path and create the empty file called Dockerfile.

Docker File Instructions listed below:
FROM - It tells the docker to which base image going to be used.
WORKDIR - It sets the working directory or folder inside our docker image.
COPY -  Copying the files from context directory to our docker image.
RUN - Run command used to build the setup.
CMD - It is used to sets the command to be run inside our docker image.
See the below Image of our Docker File 


Step 1: Adding a base image

Here “ From node: current-alpine “ command used to add the base image.

To run any application need one operating system. Here react application using, so need to node installed on it, In the docker, we have an option called the alpine base image, which is a lightweight operating system base image used for to containerized the docker.

Current-alpine means an updated version of the alpine image, "from node : current-alpine" it along with node, we can select the particular image version also.  


Step 2: Adding a working directory

                Now we have the base image with node installed alpine OS. Next need to add the working directory.

We can create the new directory or use an existing directory to copy the react application on it.

 “ WORKDIR /app

In our project, We are creating the new directory name as an app and copy the files on it.


Step 3: Copying application and installed all dependencies

Copying the react files into the ./

“COPY package*.json ./” --> The package.json file which denotes the required dependencies.

“ RUN npm install “ --> Run the npm install command is used to install the dependencies mentioned in the package.json file.

“COPY . .” --> Copy the all files from local react folder to the docker image.


Step 4: Adding and run the startup command: 

    “ CMD ["npm", "run", "start"] “ 

All the files are copied now need to check the react application working status, we need to run the npm start command to start the react application, so run the above command to start the react application.

In docker file, npm start command pass as an array format.


4.Creating the Docker Image:

Docker file getting ready, now need to create the docker image using the existing Dockerfile.

The command to creating the docker file:

Command: docker build -t techiev/react-app  .

The above command used to create the docker image 

Here dot represents the building context.


4.Checking and running the Docker Image:
        Command: docker images
The above command used to check the docker images.

Run the docker image to check the react application 
Command: docker run -it -p 3000:3000 techiev/react-app
    -it -->  it for interactive mode
    -p  --> port number mapping

Finally, we have run the react application using the docker.

We have changed the App.js file in src and changed the default react page to customized page.
Step 1:
    Changed the code in src/App.js file and create the docker image.
    Using the same Dockerfile it used the cache of old Dockerfile dependencies.

Now successfully created the docker image called techieview/react-app.

To crosschecking the images need to run the command "docker images"


Run the react application using below command.
        docker run -it -p 3000:3000 techieview/react-app

Now check the react application in a browser running the docker image.
Now code updated dockerized react application loaded in the browser.

Auto-reload functionality:

                          If we want to enable the autoload functionality to run the below command for the same.

Command: docker run -it -p 3000:3000 -v /app/node_modules -v $(pwd):/app techieview/react-app

        where -v /app/nodemodules --> It defines keep use the node_modules inside the containers.

        where  -v $(pwd):/app --> Assign the current working directory to the app folder inside the container.

             When we change the code in the present working react directory means it will affect to app folder inside the container.
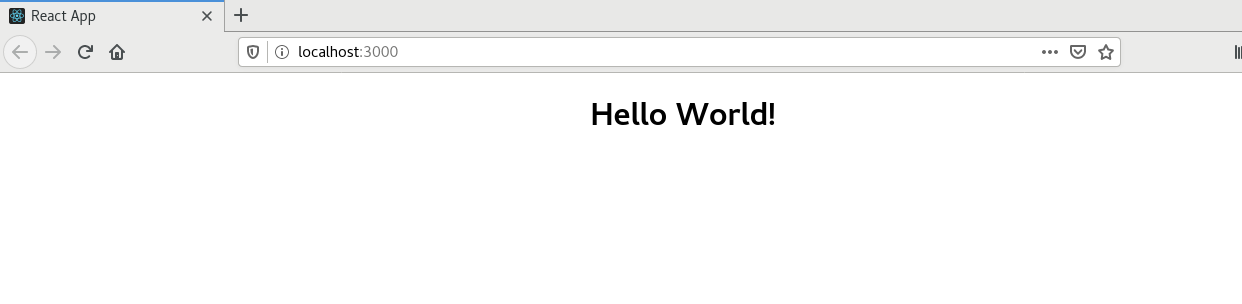
Example:


Now change the code as “Hello world testing!”, run the above command and see the result in the browser


We have successfully created and run the Docker image of react application and tested in Part 1,
In part2 we are going to build a docker image for production build, run the docker image along with the Nginx
webserver.
----------------------------------------!!!! Happy Learning with Techiev !!!!!!!!----------------------------------

-------------------------Subscribe our Youtube Channel by clicking the below link---------------------- ----------------------------!!https://www.youtube.com/@techieview729!!---------------------
Name

AWS,14,Devops,24,linux,10,
ltr
item
Techie View: Containerizing the Magic: Dockerizing and Running Your React Application (Part 1)
Containerizing the Magic: Dockerizing and Running Your React Application (Part 1)
https://1.bp.blogspot.com/-3hbniALuepk/X84fQOmauFI/AAAAAAAAAKQ/UKBDMQux13UycDi9g3B1drPsV9sLD637QCLcBGAsYHQ/w214-h320/pexels-photo-2881632.jpeg
https://1.bp.blogspot.com/-3hbniALuepk/X84fQOmauFI/AAAAAAAAAKQ/UKBDMQux13UycDi9g3B1drPsV9sLD637QCLcBGAsYHQ/s72-w214-c-h320/pexels-photo-2881632.jpeg
Techie View
https://www.techiev.com/2020/12/dockerized-and-run-react-application.html
https://www.techiev.com/
https://www.techiev.com/2020/12/dockerized-and-run-react-application.html
true
7013663511659419322
UTF-8
Loaded All Posts Not found any posts VIEW ALL View Full Article Reply Cancel reply Delete By Home PAGES POSTS View All RECOMMENDED FOR YOU LABEL ARCHIVE SEARCH ALL POSTS Not found any post match with your request Back Home Sunday Monday Tuesday Wednesday Thursday Friday Saturday Sun Mon Tue Wed Thu Fri Sat January February March April May June July August September October November December Jan Feb Mar Apr May Jun Jul Aug Sep Oct Nov Dec just now 1 minute ago $$1$$ minutes ago 1 hour ago $$1$$ hours ago Yesterday $$1$$ days ago $$1$$ weeks ago more than 5 weeks ago Followers Follow THIS PREMIUM CONTENT IS LOCKED STEP 1: Share to a social network STEP 2: Click the link on your social network Copy All Code Select All Code All codes were copied to your clipboard Can not copy the codes / texts, please press [CTRL]+[C] (or CMD+C with Mac) to copy